Camouflage cargo shorts

20160602-IMG_2972

This was a particularly satisfying project to complete having been on my “To do” list for ages. My older boy was (and still is) in desperate need of shorts as he only had one pair that fit him for this summer. Well now he has two 😉

20160602-IMG_2975

The pattern is a mash up of Oliver + s Museum trousers and Field trip cargo pants sewn in size 4 from Robert Kaufman Camouflage jacquard woven chambray in color jungle . I pretty much followed the museum trousers pattern (cropped them into shorts) and added the cargo pockets from the Field trip cargo pants.

20160602-IMG_2978

Close up of a cargo pocket. I added velcro closures to the flaps to keep them closed.

20160602-IMG_2979

Back leather detail and welt pocket. There are belt loops on the pants but they’re hard to see. I guess the camouflage is working 😉

20160602-IMG_3011

Model shots!

20160602-IMG_2988

20160602-IMG_3007

20160602-IMG_3015

He loves his new shorts and has been wearing them non-stop! Need. Moar. Shorts. 

Rainbow cropped tee and chambray culottes

20160523-IMG_2911

It’s Kids Clothes Week! If you haven’t heard what KCW is all about click here! After not participating in the last two KCW’s due to new baby/exhaustion I am so excited to actually sew something for this go around.

20160523-IMG_2884

My daughter got a new rainbow crop top tee and chambray culotte shorts. The patterns are the Mini Briar top and the Mini Tania culottes both by Megan Neilsen. I adore these patterns! They are quick to sew but also detailed and adorable.

20160523-IMG_2888

The tee was sewn in size 6/7 from a gorgeous heathered rainbow ombré knit from Funkalicious Fabrics on Etsy. The heart is from basic white performance knit from Joann’s.

20160523-IMG_2886

The culottes I also made in size 6/7 using Kaufman’s tencel chambray in color powder. It’s very lightweight and works quite well as a floaty pair of culottes.

20160523-IMG_2890

The only modification I made was to add tassels to the front.

20160523-IMG_2924

Finished outfit! I love the belly 🙂

20160523-IMG_2923

20160523-IMG_2931

Tassels!

20160523-IMG_2919

KCW is off to a great start! Even if I get nothing else done I’m still calling it a success. Anyone else sewing this week for their kids?


Baby accessories

20150525-IMG_1180

Accessories tend to make the outfit, don’t they? Even if you’re just a little baby 😉  So I decided to spend some time making a few beautiful and useful accessories to go with my baby’s layette. First up is a pair of leather shoes.

20150525-IMG_1182

I made the shoes in size 0-6 months from some beautiful leather scrap I bought off of eBay. The laces are 3/8″ cream twill tape. The pattern was this free shoe pattern which I modified by scaling it up (printed at 110%), did two lacing holes rather than three, omitted the heart cutouts, added some topstitching, and also changed the shape of the heal piece to create the look I was after on the shoe front.

20150525-IMG_1181

I love these little shoes!

20150525-IMG_1183

Next up are some reversible bandana-style drool bibs.

20150525-IMG_1187

I sewed them using this free tutorial in size 6-12 month and included the optional size adjustment snap to make them fit at a smaller size as well.

20150525-IMG_1189

The fabrics are various ones from my stash (a lot of them are Kaufman railroad chambray’s) and the snaps are size 15 metal snaps from Snapsource.

20150525-IMG_1192

Lastly I made a little reversible bucket hat from the free Oliver + s pattern available here. I made it in size XS out of Robert Kaufman Railroad Poplin and Cotton Steel Tokyo Train Ride Harajuku in color aqua. I did modify the pattern by widening the brim a little and I added a little chin strap with velcro closure.

20150525-IMG_1193

Reverse side. I just love those cute animals!

Only a few weeks left until I welcome this little baby! I wonder how much more sewing I can get done for him before he arrives.

Does anyone else enjoy the nesting energy before baby comes or do you prefer to do nothing and take it easy?

Merry Christmas and happy New Year!

I know, I know. It’s been quite a while hasn’t it? It’s amazing how a tiny embryo can sap your will to live plus any and all desire to sew. Well now that I’m in the second trimester (yup that was a pregnancy announcement if you didn’t catch it!) my urge to puke has finally gone and the sewing bug has come back in full force, and thankfully it was just in time for my Christmas sewing! So without further ado, here’s what I made my family for Christmas.

20141222-IMG_9962-2

For starters I made a zillion aprons. Ok, it was only four but if felt like a zillion 😉 For the pattern I followed this tutorial from Purlbee.

20141219-IMG_9951-2

All of them were made from medium weight 100% linen fabric from Joann’s and the pockets made from scrap fabric from my stash.

20141219-IMG_9956-2

I just knew all those little-but-too-big-to-throw-away pieces would come in handy! The aprons went to my parents and in-laws.

20141219-IMG_9941-2

For my sister’s boys I made them Star Wars pj bottoms since she told me they are very into all things Star Wars right now. The fabric was from Joann’s and the pattern was a free one from fabric.com. Overall quite simple and very cheap to make (and my sis tells me they were a hit!)

20141219-IMG_9948-2

For my sister’s teenage girl I made her a teenage mutant ninja turtle cross-body purse. The TMNT fabric and the ribbons were from Joann’s, and the denim from my stash. The pattern is a free tutorial here.

20141219-IMG_9958-2

I had a special request for this cloak from my sister’s younger daughter. She had seen this one I made for my daughter on her birthday and requested one in purple for Christmas. And so here it is!

20141219-IMG_9960-2

The pattern is the Red Riding Hood cloak from Oliver + S book of Little Things to Sew. I used a stretch purple crushed velvet and shimmery berry lining fabric both from Joann’s. To make it extra special I added some beautiful gold trim to the hood, also from Joann’s. I’d have to say I love this cloak for dress up! It always turns out so stunning.

20141219-IMG_9937-2

For my two young nieces on my husband’s side I made some hand-kites using wooden teething rings from etsy and different colored satin ribbons which I simply knotted on. I also personalized them by writing each girl’s name on it. I love this gift so much for young kids! Beautiful, fun, cheap, and easy!

20141219-IMG_9943-2

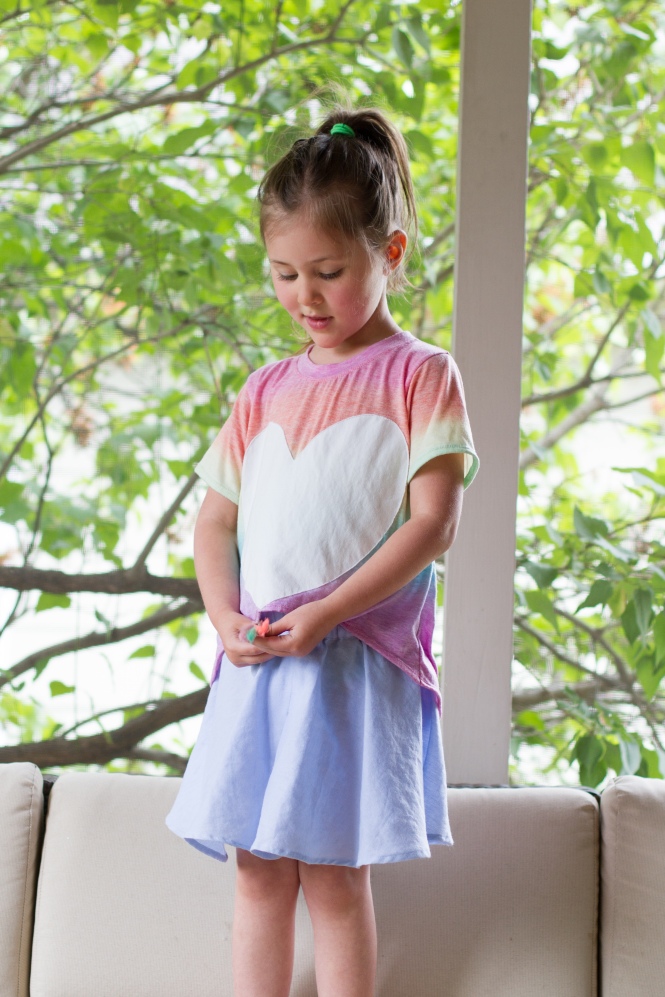
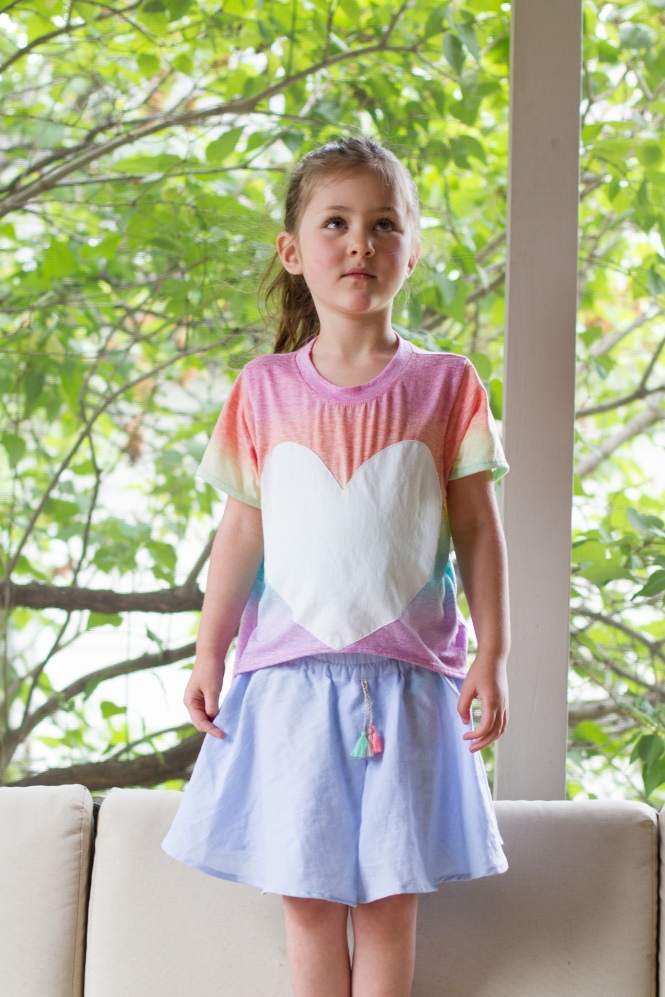
My daughter had requested a dress-up dress for Christmas. A PINK dress-up dress. She doesn’t know about Frozen yet but I thought this free tutorial from Peek-a-boo patterns was just perfect anyhow! And so I ransacked Joann’s and Hobby Lobby for all the shimmery pink fabrics I could find and put together this little number. What I ended up using was a shimmery white spandex for the yoke/sleeves, a glittery light pink stretch velvet for the bodice, pink poly satin for the underskirt, pink iridescent tissue lamé for the over skirt, and shimmery white organza for the cape.

20141219-IMG_9945-2

Not only is it bursting with glittery pink spectaular-ness but it’s also stretchy and very comfortable which is perfect for play clothes! This is hand’s down her most favorite thing I’ve sewn her to date!

20141229-IMG_9984

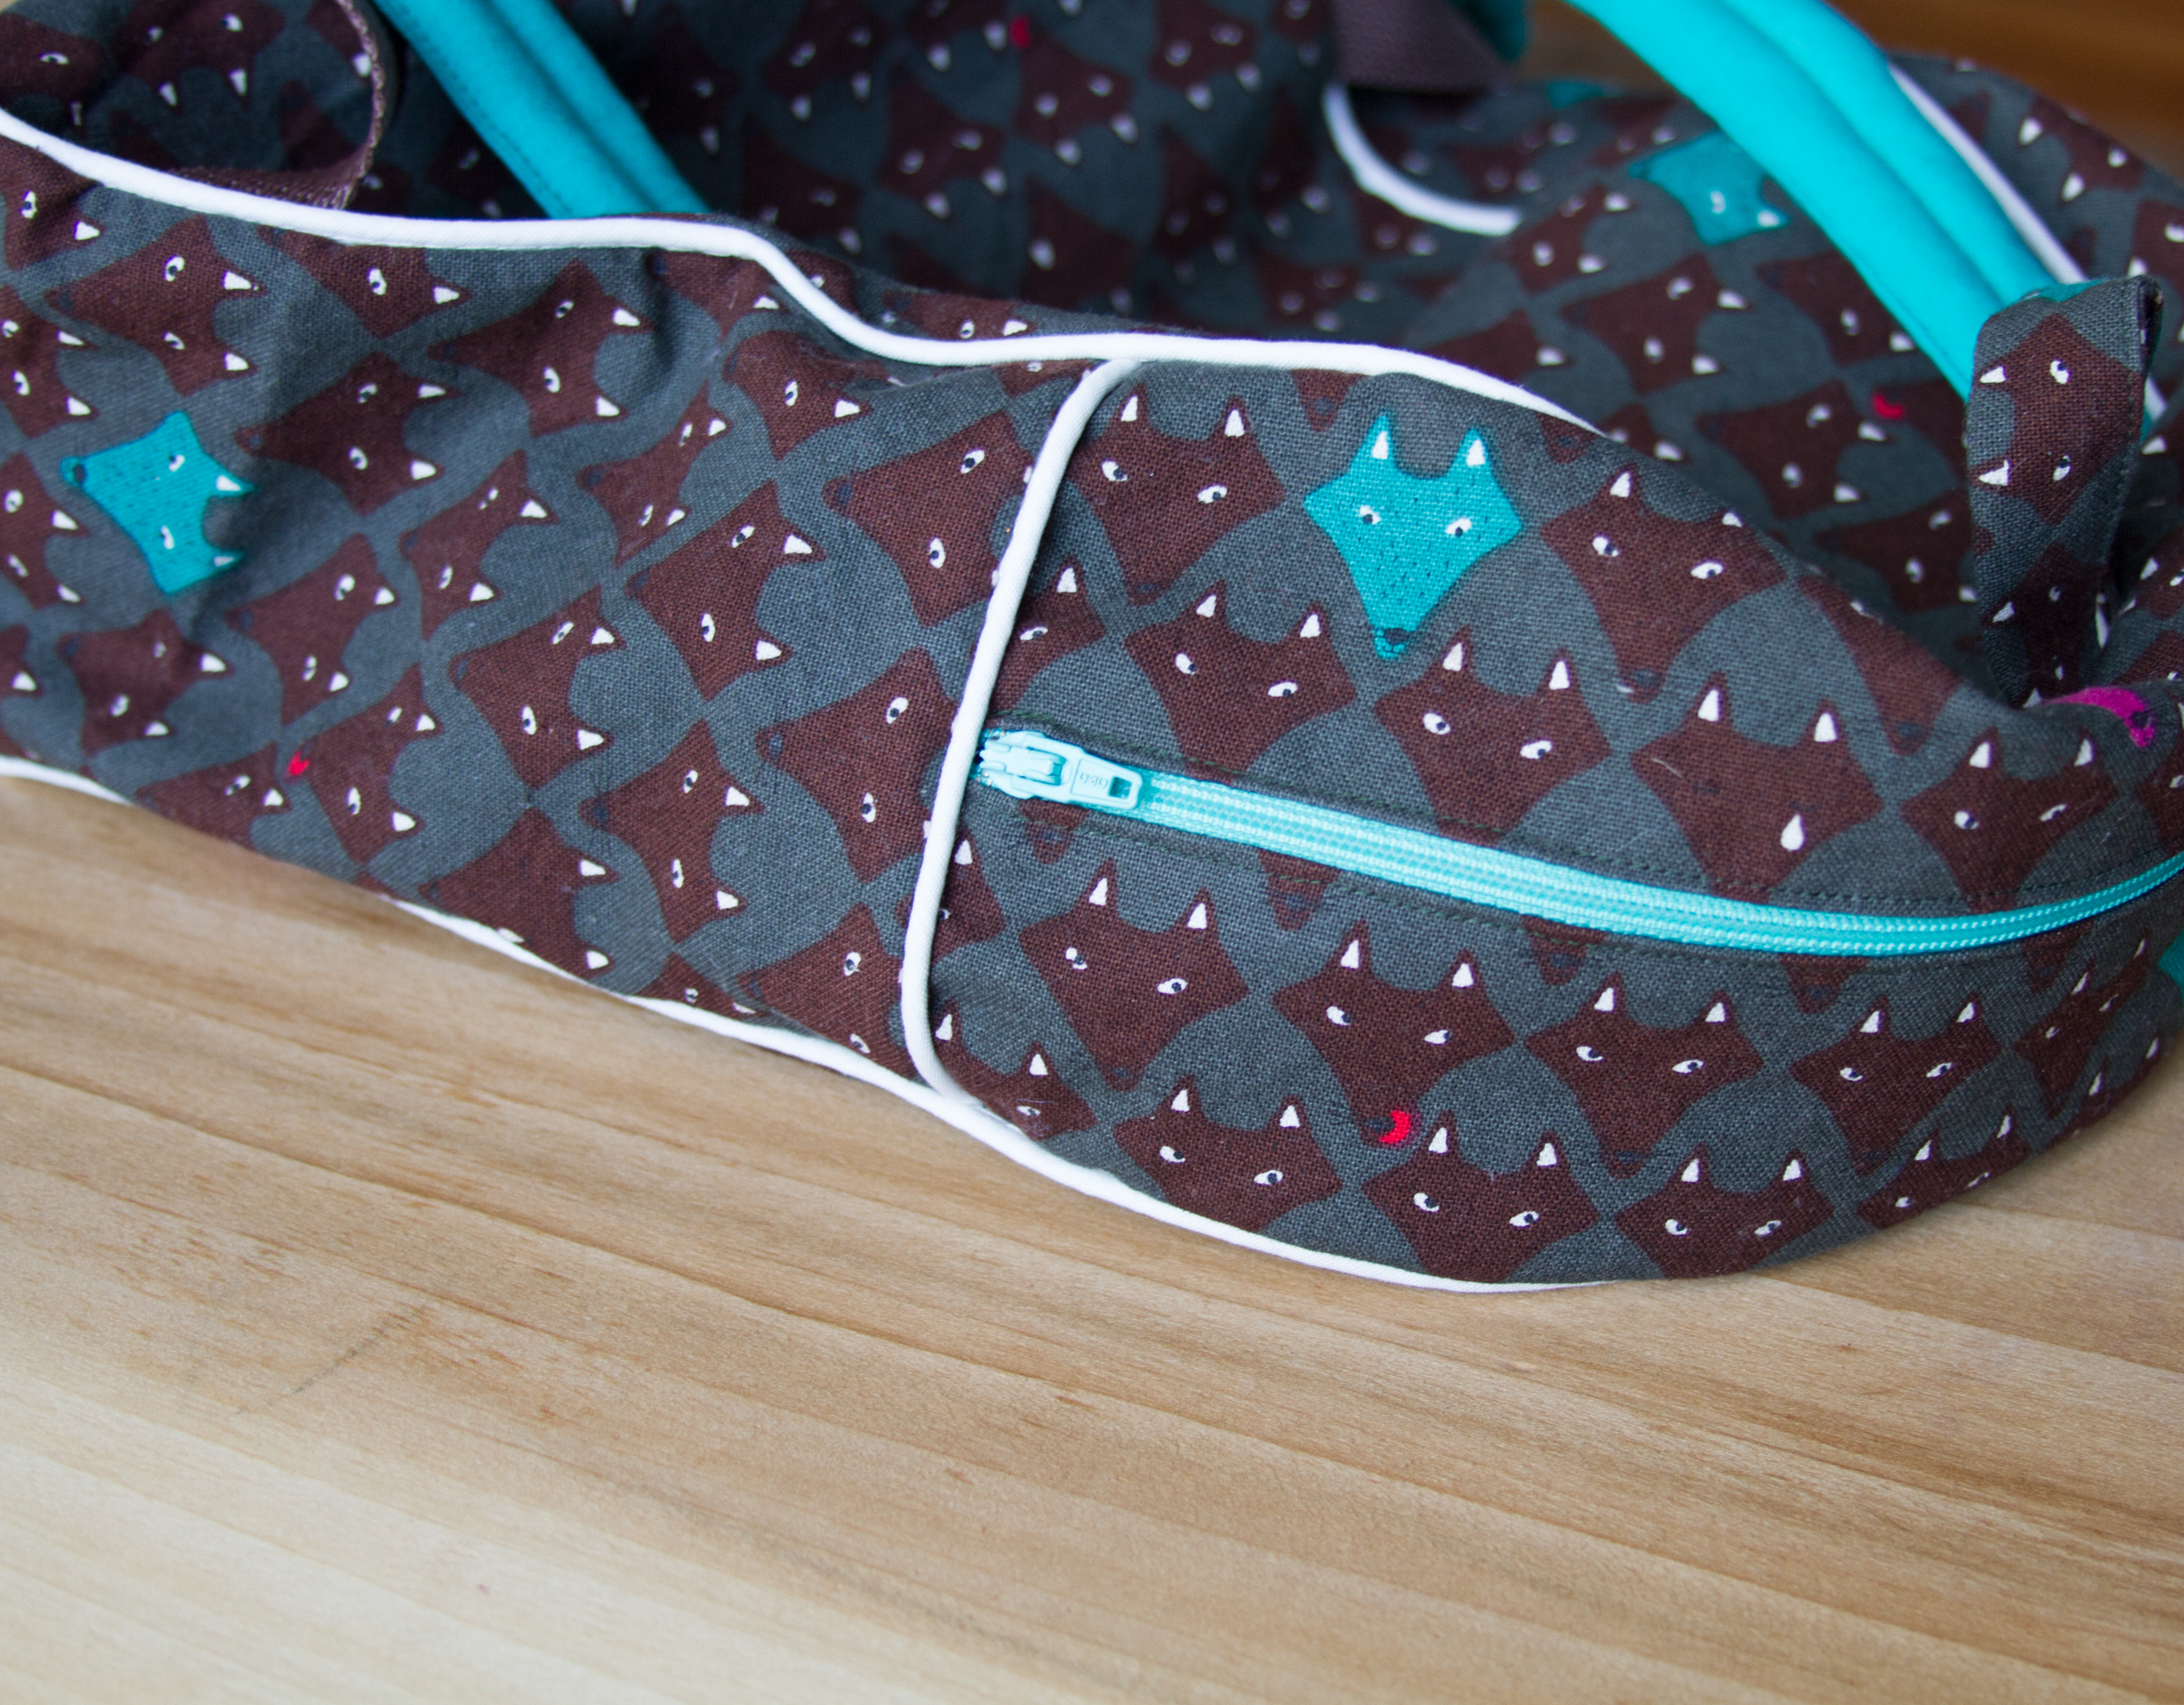
Lastly I made my son a backpack. I’ve made quite a few of these over the years (five others actually!) and they’ve always been a huge hit.

20141229-IMG_9986

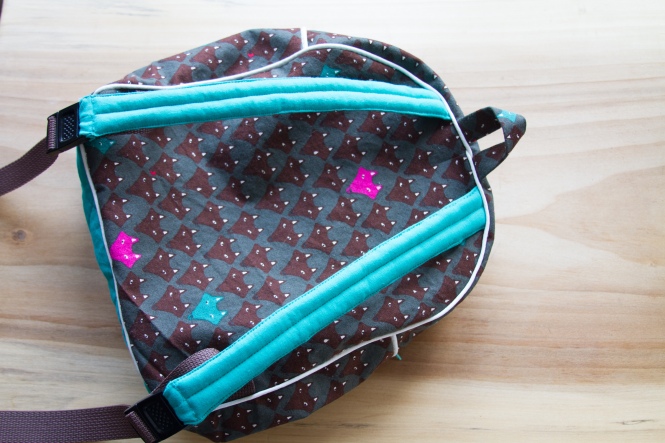
The pattern is a Made by Rae pattern which you can find here. For the fabric I used a Japanese “hungry wolf” light-weight canvas from this shop on Etsy.

20141229-IMG_9988

I love this fabric so stinking much! The colors! The wolves licking their chops! Just perfection. For the contrast fabric I used some teal cotton twill from Joann’s.

20141229-IMG_9990

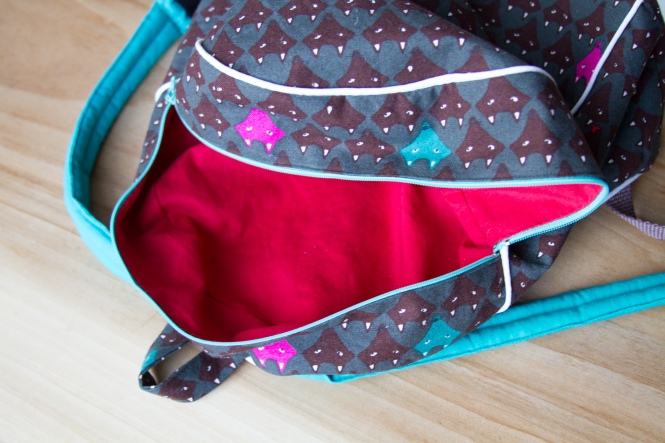
I lined the inside with a bright red cotton to match the wolves tongues. Not creepy at all right? Right.

Well there you have it! I wanted to get so much more done for Christmas, like outfits for the kids, but I’m just glad I was able to get all the gifts completed. Did you sew gifts for Christmas or do you prefer to take a break for the holidays?

Some selfish sewing

20141013-IMG_9693

I don’t often sew for myself but of course the urge should hit during KCW, exactly when I should be sewing for my kids not myself! Oh well, I’ll just roll with it and hope to get something completed for them before the week is out 😉

20141022-IMG_9700

Remember that sweatshirt I sewed for my daughter during PR&P signature style week? Well, I loved it so much I made one for myself too!

20141013-IMG_9695

The pattern is from a modified Oliver + s metro t-shirt sewn in the gorgeous Liberty of London sweatshirt cotton fleece. I made the body and sleeves wider and added cream ribbing to the bottom cuffs and waist.

20141022-IMG_9701

Have I mentioned how seriously dreamy this fleece is? This sweatshirt pretty much my favorite item of clothing ever!

20141013-IMG_9686

Since I was in the swing for sewing for myself, I also made another modified Metro t-shirt from this pretty Joann’s floral jersey. For the modifications I scooped out the neck some and finished the bottom sleeve edges differently, like you would if you were sewing a ribbing cuff.

20141022-IMG_9698

The scooped out neck! I had to lengthen the neck binding piece quite a bit to make up for making the neck opening larger. I also nipped in the waist a bit for a sleeker silhouette.

20141013-IMG_9683

Shirt back.

20140810-IMG_0716

And while I’m blogging about things I’ve sewn for myself, here’s a pair of shorts I made a few months ago that somehow fell between the blogging cracks.

20140810-IMG_0719

The pattern is the City gym shorts from purlbee. They offer both children’s and women’s sizes and the best part is that they’re free!

20140810-IMG_0721

For my shorts I used my very favorite Liberty from my stash plus some Kaufman linen blend chambray also from my stash and Kaufman interweave chambray as the bias binding. I love these shorts and pretty much lived in them this past summer!

I’m not sure why I find it so hard to do a post on things I’ve sewn for myself. Goodness knows I put if off long enough! Anyone else have that problem?

On to KCW!

PR&P week 3 – Denim challange

20141002-IMG_9470

It’s week three of Project run & play! This week the challenge is to sew an outfit out of denim. I really loved this theme; it helped to fill in my boy’s wardrobe ;). I decided to sew him an indigo blue chambray shirt, burnt orange denim pants, plus a quilted denim and chambray puffer vest with detachable hood.

20141002-IMG_9473

For the shirt I used the Sketchbook shirt pattern by Oliver + s sewn in size 2 from Robert Kaufman union stretch shirting in indigo. I added a front flap to the shirt pocket as well as a small leather tag on the pocket for some extra detail, and decreased the size of the collar for a slim look.

20141002-IMG_9476

Detail shot! I really love including little bits of leather on my boys clothes. It adds such a great finishing touch!

20141002-IMG_9479

The pants were sewn from the small fry skinny jeans free pattern provided online here. The free pattern only comes in size two and with patch pockets rather then traditional jeans pockets. I altered the pattern to have the traditional pockets with penny pocket. I sewed them from a gorgeous burnt orange denim with Indian Summer menagerie as my lining. The size two is quite roomy and my boy will be able to wear these for quite some time!

20141002-IMG_9478

I also added some quilted knee patches because I love to quilt all the things. 😉

20141002-IMG_9480

The back pocket also got a little leather tag.

20141002-IMG_9475

To complete the look I made him a denim quilted puffer vest with detachable hood.

20141002-IMG_9481

The pattern is the Great outdoors reversible vest by Peek-a-boo pattern shop sewn in size 2 from Kaufman Newcastle denim and lining in Indian Summer menagerie. The hood I color-blocked with Andover chambray in color gray. For the batting I used reclaimed wool which I found on Etsy. Wool is seriously warm and cozy; perfect for the cold weather here in Montana!

20141002-IMG_9548

The completed look!

20141002-IMG_9496

Love the color-blocked hood.

20141002-IMG_9532

So happy with his quilted knee patches!

20141002-IMG_9521

Vest close up with leather tag embellishment.

20141002-IMG_9522

Denim challenge completed!

Have you seen the looks created by the competitors? Check them out here.

Onward to week 4! See you then!

A “first day of Preschool” tunic

20140911-IMG_9235

There’s nothing so exciting as the first day of school, and to commemorate it I decided to sew my daughter a new tunic for the occasion! You may recognize these fabrics from some previous projects I’ve made for my daughter. Yes, I’ll admit, I went a little crazy with this chambray and sewed All. The. Things. from it. Well this is officially the last project from this chambray!

20140911-IMG_9238

For the sewing pattern I mashed up elements from several different Oliver + s patterns; the main bodice is from the Playtime tunic, the sleeves from the Hide and Seek dress, and sleeve tabs from the Jump Rope dress all sewn in size 4 width 5 length from a gorgeous indigo Balinese handwoven Ikat and the much loved Kaufman union chambray in indigo.

20140910-IMG_9198

Girl showing some modeling ‘tude 😉  I made a few modifications to the pattern pieces themselves to get the fit I was after. The playtime tunic has wide shoulders, so I trimmed off about 1.5 inches to the width there so the seam was near to her shoulders. I also shortened the hide and seek sleeves slightly so they hit just above the elbow.

20140910-IMG_9124

Instead of topstitching a collar design onto the dress I opted to construct an actual collar which I stitched on around the neck like an appliqué. In hindsight I would have constructed the collar a bit differently, but I was figuring this out as I went so mistakes were inevitable 😉

20140910-IMG_9199

For the sleeve tabs I doubled the length of the jump rope pattern piece to allow them to wrap completely around the cuff and hold it in place.

20140910-IMG_9204

In keeping with my heirloom sewing streak, I used some lovely mother of pearl buttons which I’d bought off of Ebay.

20140910-IMG_9215

And now for some action shots with her backpack!

20140910-IMG_9208

The backpack I made several years ago from lovely Heather Ross Far far away II. I love getting use out of old projects!

20140910-IMG_9217

20140910-IMG_9231

Preschool success!

Back to school sewing is so much fun to do! What school clothing have you been sewing for your kids?

Sketchbook & jumprope polo mash-up ~ a tutorial

20140819-IMG_0821

Have you had one of those “A-ha!” moments in your sewing? This shirt was one of those moments for me. I had been wanting to sew a pull-over polo style top for my son and I had several patterns that were very close but not exactly what I wanted. And so after digging through my pattern stash I realized all the steps needed to create this top were already done for me, and all I had to do was “mash” them up!

20140819-IMG_0826

The patterns I used are both Oliver + s; the sketchbook shirt and the jump rope dress, both in size 2 sewn from Robert Kaufman nautical boats chambray in color indigo. This mash up is super simple, requiring very little in the way of changes to the actual sewing instructions. If you’ve got these two patterns, you can make this top! 

20140819-IMG_0827

This shirt is pretty much the sketchbook shirt but with the jump rope placket. Here’s what you do:

From the sketchbook shirt pattern cut out the following numbered pieces as specified by the pattern unless I state otherwise # 1 – shirt front* (cut one with center front on the fold), 2 – shirt back, 4 – shirt yoke, 5 – shirt collar, 10 – shirt pocket* (I cut out two and rounded the bottom corners), 11 – short sleeve.

From the jump rope dress pattern cut out pieces # 3 – right placket, and 4 – left placket.

Now you simply follow the directions as outlined in the patterns but in a different order. Here’s the order for you!

Start with the jump rope dress instructions and follow these sections in this order;

  • “Prepare the placket”. You will be using the sketchbook front pattern piece which you cut on the fold in lieu of the dress front pattern piece. 
  • “Right placket”. You may want to swap the sides on which you sew the left and right plackets for a boy’s shirt. I forgot to do this and so my buttons/button holes are on the “girl” side of the shirt.
  • “Left placket”.
  • “Finish the placket”.

20140818-IMG_0819

Now switch to the sketchbook shirt instructions and follow these sections in this order;

  • “Make and attach the pocket”. Since I had rounded bottom edges I basted 1/2″ from the edge and used the stitching as the folding line which I then ironed in place. If you want buttons on the pockets; mark the center top of the pocket and stitch a buttonhole 1/4″ from the top edge before stitching the pocket onto the shirt. 
  • “Assemble the shirt back”.
  • “Assemble the shirt and finish the yoke”. You will only have one shirt front piece since you cut it on the fold. This doesn’t effect the sewing instructions.
  • “Prepare the collar”.
  • “Attach the collar”.
  • “Attach the sleeves”.
  • “Finish the short sleeves”.
  • “Hem the shirt.”

To finish the shirt go back to the jump rope dress and use the markings for the buttons/buttonholes to sew them onto the plackets. If you included buttons on the pockets mark and sew them now onto the shirt centering them beneath the pocket’s sewn buttonholes.

20140819-IMG_0856

And voila! Adorable pull-over polo shirt!

20140819-IMG_0860

And now for a few action shots!

20140819-IMG_0838

20140819-IMG_0854

What a great shirt to wrap up my boy’s summer sewing with! 

Did you find the tutorial helpful? If anyone needs clarification please do let me know! I’d love to see any mash-ups you create with it 😉

Liberty & chambray swingset tunic

20140812-IMG_0767

I’ll have to admit, I’m a sucker for all things Liberty of London. Liberty prints are in a class all their own, being both exceptionally beautiful and high quality; you can’t go wrong with some Liberty in your life. 😉 While I was sewing my daughter’s ruffled shorts I used a bit of this print which I had been hoarding for ages as the lining. And then it struck me; I needed to make a Liberty tunic to match! 

20140812-IMG_0771

For the sewing pattern I used the Swingset tunic by Oliver + s sewn in size 4 width 5 length. The fabric is of course the lovely Liberty of London tana lawn from my stash with the straps, covered buttons, and lining in Kaufman union chambray.

20140812-IMG_0777

Button detail shot. I covered the buttons myself using a button cover kit from Joann’s. Very quick, easy, and provides a wonderful look when you want matching fabric buttons.

20140812-IMG_0778

Contrast chambray straps ❤

20140812-IMG_0774

A look at the innards. I finished the inside bodice lining seam with 1/4″ charcoal bias tape. This method of seam finishing does take a bit more time than simply serging the seams but the finished look is completely lovely. Since I’m leaning more towards heirloom sewing these days the extra time is worth it in my book!

20140812-IMG_0816

The tunic and shorts together. So frilly and flowery, my girl and I just love this outfit!

20140812-IMG_0806 Oh, hello chambray buttons. Fancy meeting you here 🙂

20140812-IMG_0807 And now for some gardening action shots 😉 

20140812-IMG_0813

20140812-IMG_0812

Do you have a Liberty crush like I do? What’s your favorite Liberty project?

Summer KCW – day 7

20140728-IMG_0569

KCW always ends up being one crazy productive week over here and this time was no exception! Both kids got a complete outfit out of me, and whew I’m beat! To finish up my daughter’s ensemble I whipped up these lovely puppet show shorts by Oliver + s.

20140728-IMG_0573

These are sewn in size 4 width 5 length with no other modifications to the pattern. They sewed up quite fast and were a great last project to finish KCW up with. I wanted these to be as versatile as possible so I made them out of a simple yet lovely Kaufman union chambray in indigo.

20140728-IMG_0576

Oliver + s patterns usually include such lovely little hints, like adding some ribbon or fabric tape to mark the back of the garment, as pictured above. My daughter likes to dress herself now and this makes it much easier for her to not get her clothes on backwards!

20140728-IMG_0579

Belly button! Oh and cute shorts too 😉

20140728-IMG_0617

The finished outfit!

20140728-IMG_0619

20140728-IMG_0625

These will be a wardrobe staple for sure!

KCW success! I think I’ll celebrate by lying down now 😉

How was your KCW sewing week? Did you get everything done you wanted to or did the kids have other plans for your time?